-

Custom Timber Frame Design And Construction.
Timber Ledger » Stud Pack » Top Plate » Load Paths
TIMBER TRUSS CONNECTION
Attaching a Timber Truss to Conventionally Framed Wall
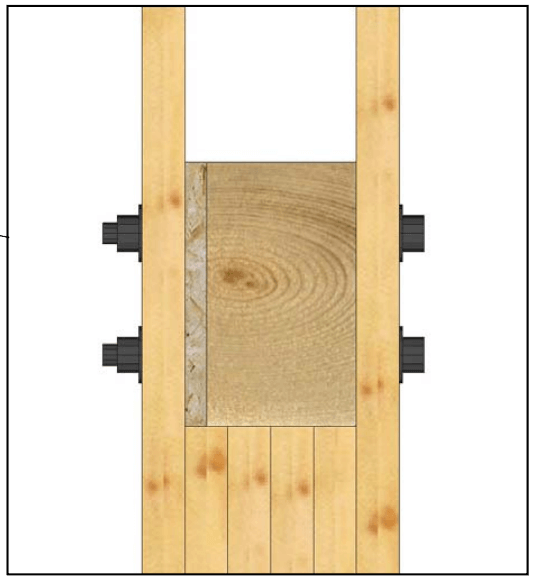
The image below shows a typical connection between our timber truss and a conventionally framed wall. If your timber system is structural, adequate load paths are necessary all the way down to the foundation. This example shows the use of a “stud pack” to carry the load of the truss and roof down towards the foundation. A stud pack is multiple studs nailed together. A stud pack should be at least as wide as the member it will be carrying. (e.g., a truss that is 7-1/4” wide should be on a stud pack that is no less than 5 studs thick, which is 7-1/2” wide.)
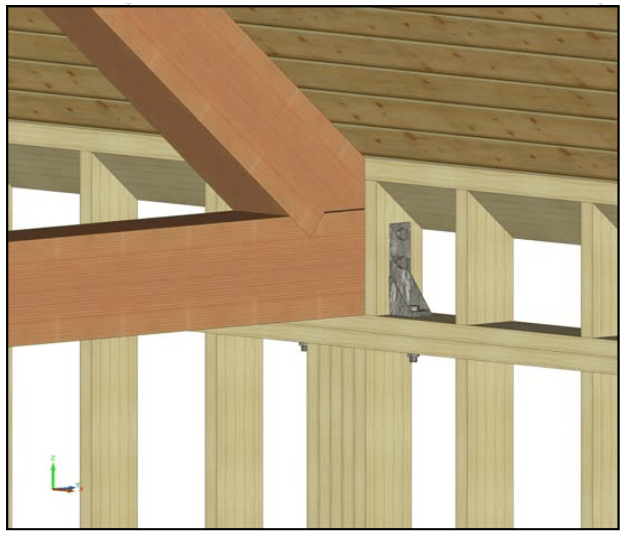
In this example, two Simpson HD2A hold down connectors are used to resist uplift and hold the truss in place. A piece of 2x blocking is placed between each HD2A and the truss. This 2x blocking will act as a nailing surface for your interior sheathing (e.g., sheetrock or decking). Typically, infill framing with a top plate ripped to match the roof pitch will then be installed. This infill framing will provide adequate framing structure and an area to insulate. The HD2A will use thru bolts through the truss and plate of the wall whenever possible. It is possible to use lag bolts under certain circumstances if approved by an engineer. Once interior and exterior sheathings are applied, this type of connection is completely hidden.
Connecting a Timber Ledger to a Conventionally Framed Wall
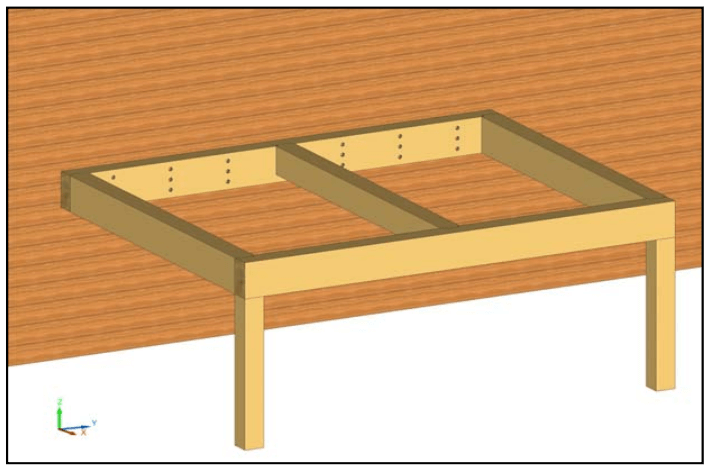
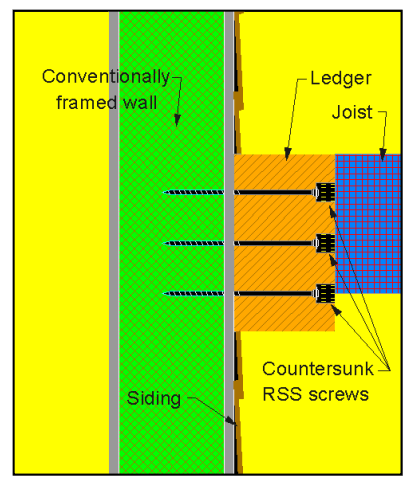
The above examples show the attachment of a timber ledger to a conventionally framed wall. Timber ledgers can be used to carry joists, rafters, etc. Whether or not the structure is new construction, the timber ledger must be applied to a flat surface which has no siding on it. If the attachment is being made to an existing structure, the siding will need to be cut out in the location where the ledger is to be attached. Note, the above diagram does not show flashing. It will be necessary to properly flash the ledger attachment. Make sure builder has adequate flashing plan prior to installation of ledger. The ledger is typically attached to the wall using structural grade screws, countersunk into ledger, screwed into each wall stud. The quantity of screws necessary will be prescribed by our engineer and will be job specific. After the ledger is attached to the structure, all the countersunk holes can be plugged and the remainder of the timber system can be attached using pre-cut and pre-fit joinery.
Supporting a Plate Using a Conventionally Framed Wall
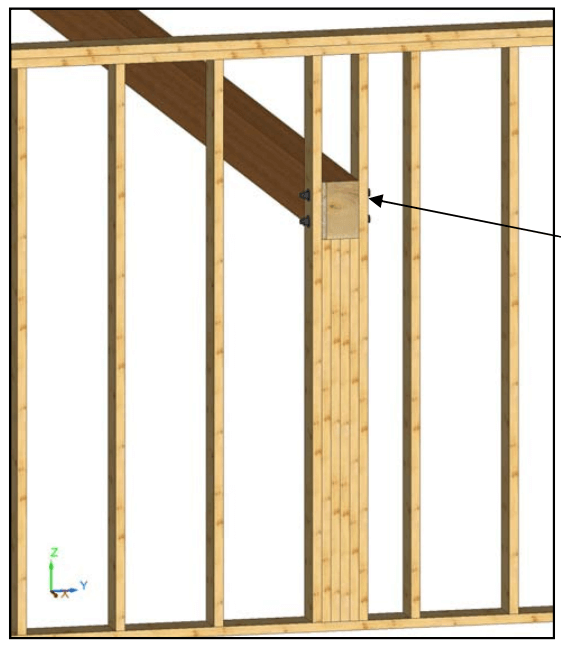
The above examples show how to support a plate, ridge, joist, or girt using a conventionally framed wall. Find the exact location that the plate needs to be. Frame a stud pack to support the load of the plate. Use at least as many studs in your stud pack as is necessary to make your stud pack as wide, or wider, than the plate. Frame in a full height stud on either side of your stud pack. If the plate width and the stud pack width is different, use plywood or OSB to pack out any space. Drill and insert thru bolts through the full height stud, spacer block, and plate. Tighten. Connection is complete. Once interior and exterior sheathing are installed, this connection will be completely hidden.